Tuesday, 29 May 2012
Wednesday, 9 May 2012
How to V2P rednectar's GNS3 Workbench
First who ever is reading this blog must thank those amazing people who have spent their time to develop tools like Dynamips, Qemu, Dynagen, GNS-3...to entire open-source community ...list will never end.
After going though Chris's amazing work of GNS3-Workbench, I had tried to make it V2P and it works.
Though I have not tested everything but I am sure if any issue is there it can be overcome.
So let's begin


After going though Chris's amazing work of GNS3-Workbench, I had tried to make it V2P and it works.
Though I have not tested everything but I am sure if any issue is there it can be overcome.
So let's begin
- Get all required files from sourcef0rge and do exact as the documentation says.
- Add @cr0nis h0m3 edition bootable CD ISO file in virtual CD and check connect on power option.. google about it and you may get it.
- Add another HDD in Vmw@r3 as a physical drive. This is important. Care should be taken. This HDD should be an USB drive or Another HDD drive or External USB Harddrive (Not any drive or partition the hardisk on top of which your OS is installed !!!). Though it can be done but it needs extreme care else your original OS will be not be bootable.
- Remove USB hardware support from VMW@r3 guest machine. This is required.
- Start Guest VM as power on to BIOS mode and select boot from CD-ROM and Save BIOS by F10 ... It will restart the Guest OS
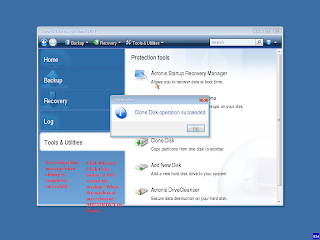
- Now inside Acr0n1s, select clone harddisk. Source will be Rednectar's original hard-drive and destination will be another HDD you have just added before in above step. Select all available partitions inside source HDD (rednectar's) including SWAP partion.
- After it is over a successful message will come and you need to power off the guest OS.
- Next steps are very important.
- Now you need to mount the second HDD to any Ubuntu OS. I have used same GNS-3 Workbench Ubuntu to mount the cloned HDD.
- be root...sudo su - ... Type password as password
- type blkid /dev/sdx1 ... here x is the second HDD drive first partion "/boot". You will get an UUID for the partion and this will be applied in /boot/grub/grub.cfg
- then chmod 0644 /media/xxxxxxxx/boot/grub/grub.cfg . here xxxxxx is random mounted file name...by automount...mostly a label or the UUID
- apply the new UUID .. by " nano /media/xxxxxxxx/boot/grub/grub.cfg in 4 places.
- Now the second cloned HDD is ready to start. Connect it to an actual machine.
- If the second HDD is SATA , select it from machine BIOS as boot target ...else if is USB Drive select boot option USB HDD in BIOS..Here we are changing BIOS of actual machine not VmW@r3 virtual BIOS


Subscribe to:
Posts (Atom)